一、新建项目Demo2
二、安装 参考文献:Installation | Vue Router
npm install vue-router@4三、新建目录及页面
/products/index.vue
<template> <h1>产品管理</h1> </template> <script setup> </script> <style> </style>/merchands/index.vue
<template> <h1>商品管理</h1> </template> <script> </script> <style> </style>四、修改
index.html
<!DOCTYPE html> <html lang="en"> <head> <meta charset="UTF-8" /> <link href="/favicon.ico" /> <meta name="viewport" content="width=device-width, initial-scale=1.0" /> <title>Vite App</title> <script type="module" src="/src/main.js"></script> </head> <body> <div id="app"> </div> </body> </html>App.vue
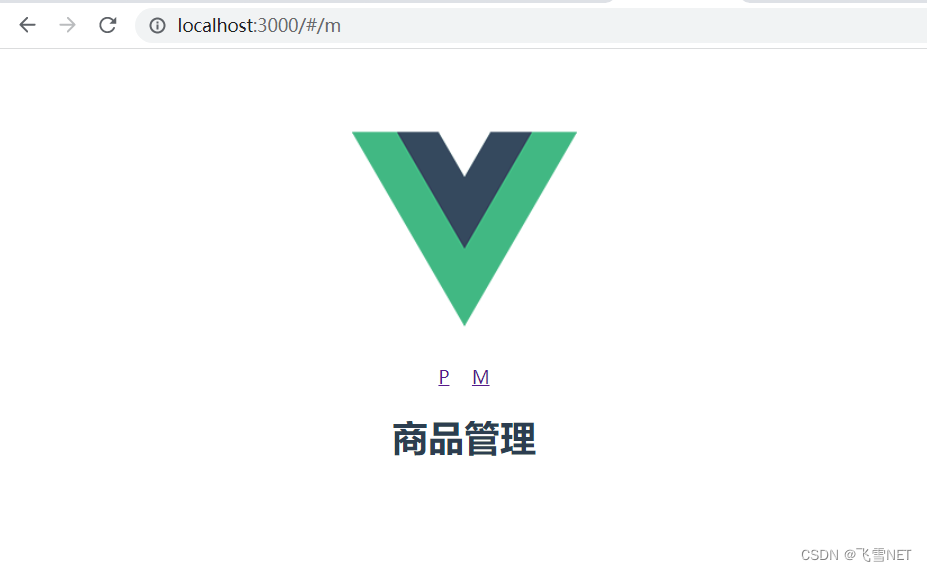
<script setup> </script> <template> <img alt="Vue logo" src="./assets/logo.png" alt="vue3-VueRouter使用" /> <p> <router-link to="/">P</router-link> <router-link to="/m" style="margin-left: 20px;">M</router-link> </p> <router-view></router-view> </template> <style> #app { text-align: center; color: #2c3e50; margin-top: 60px; } </style>main.js
import { createApp } from 'vue' import * as VueRouter from 'vue-router'; import App from './App.vue' import Product from './products/index.vue' import Merchands from './merchands/index.vue' const routes = [ { path: '/', component: Product }, { path: '/m', component: Merchands }, ] const router = VueRouter.createRouter({ // 4. 内部提供了 history 模式的实现。为了简单起见,我们在这里使用 hash 模式。 history: VueRouter.createWebHashHistory(), routes, // `routes: routes` 的缩写 }) createApp(App).use(router).mount('#app')五、效果